Are you tired of spending a fortune on small containers of vegan coconut yogurt, only to find them loaded with thickeners, sugars, and additives you can barely pronounce? Imagine a world where creamy, rich, and naturally thick dairy-free yogurt is not only affordable but also incredibly easy to make right in your own kitchen. Thanks to the magic of the Instant Pot, that world is well within reach!
This comprehensive guide will show you exactly how to make vegan coconut milk yogurt that's luxuriously thick, delightfully tangy, and completely free of unwanted extras. Say goodbye to the gummy texture of some store-bought varieties and hello to homemade perfection, reminiscent of Greek-style yogurt, all with minimal effort.
Why Make Your Own Instant Pot Vegan Coconut Yogurt?
The allure of homemade vegan coconut yogurt extends far beyond simple cost savings. While that's certainly a significant benefit, the true value lies in complete control over your ingredients and the superior quality you can achieve.
The Cost-Effective & Additive-Free Choice
Walk down the dairy-free aisle, and you'll quickly notice that vegan yogurts, especially those made from coconut milk, come with a premium price tag. For often just a few servings, you might pay what it costs to make a whole batch at home. Beyond the expense, many commercial options rely on an array of gums, starches (like tapioca starch, which can result in an "off" mouthfeel if used incorrectly), and sweeteners to achieve their desired consistency and flavor. By learning how to make vegan coconut milk yogurt at home, you eliminate these questionable ingredients, ensuring a truly clean and wholesome product.
Unleashing the Power of Your Instant Pot
The Instant Pot isn't just for quick dinners; it's a game-changer for fermentation. Its "Yogurt" function (or even the "Saute" and controlled cooling you'll learn about) provides the perfect, consistent temperature environment for probiotics to thrive. This hands-off approach takes the guesswork out of maintaining the ideal warmth, which is often the trickiest part of traditional yogurt making. With your Instant Pot, you get reliable, repeatable results every time.
Mastering the Art of Thick, Creamy Vegan Coconut Yogurt
Achieving that coveted thick, spoonable texture in your homemade vegan coconut yogurt comes down to a few key steps. It's not about adding excessive thickeners, but rather understanding the interplay of fat content, heat treatment, and fermentation.
Choosing the Right Coconut Milk: The Foundation of Success
This is arguably the most critical decision. For a truly thick and creamy result, you must use full-fat, canned coconut milk. Look for cans that list only coconut and water as ingredients, or sometimes a small amount of guar gum, which is generally acceptable. Avoid "light" coconut milk, refrigerated coconut beverages (which are mostly water), or brands with excessive additives. The higher fat content is what ultimately contributes to that luxurious, Greek-style thickness once chilled. Some brands separate more easily in the can (cream on top, water below), while others are homogenized; both can work, but a higher cream content is always beneficial.
The Probiotic Magic: Selecting Your Starter
To transform coconut milk into yogurt, you need live, active cultures. You have a few options for your starter:
- Store-bought vegan yogurt with live active cultures: Ensure it explicitly states "live and active cultures" on the label and is unflavored. Aim for a brand with minimal ingredients.
- Probiotic capsules: Look for capsules with a high CFU count (e.g., 25-50 billion) and multiple strains of beneficial bacteria, especially those known for yogurt production like Lactobacillus bulgaricus and Streptococcus thermophilus. Avoid enteric-coated capsules, as you want the cultures to be released directly into the milk.
A fresh, potent starter is crucial for successful fermentation and a tangy, probiotic-rich yogurt.
Sanitization & Heating: Crucial First Steps
Just like any fermentation process, cleanliness is paramount to prevent unwanted bacteria from competing with your beneficial cultures. Ensure your Instant Pot insert, whisk, and any other utensils touching the coconut milk are thoroughly sanitized. A dishwasher with a sanitize cycle is ideal. Otherwise, a quick boil or rinse with boiling water will do the trick.
Next, you'll need to heat your coconut milk. This step serves two purposes: to kill off any potential competing bacteria and to alter the milk proteins slightly, aiding in a thicker final product. Many Instant Pot "Yogurt" functions have a "Boil" setting, but some machines, like the one in our Homemade Vegan Coconut Yogurt: Instant Pot Saute Secret guide, might not reach the ideal temperature of 180°F (82°C) using this setting. A rolling boil ensures you hit this temperature effectively. The trick? Use the "Saute" function on your Instant Pot. It quickly brings the coconut milk to a boil. Once it reaches a rolling boil, you can safely assume it has surpassed the 180°F mark. Stir frequently to prevent scorching.
After heating, you must cool the coconut milk down to the ideal temperature range for your starter cultures, typically between 105-115°F (40-46°C). If it's too hot, you'll kill the probiotics; too cold, and they won't activate. A thermometer is highly recommended here, but if you're without one, the "finger test" (where the liquid feels very warm but comfortable to touch for several seconds) can work for experienced yogurt makers. Once cooled, whisk in your chosen starter thoroughly.
Fermentation: The Instant Pot's Secret Weapon
This is where your Instant Pot truly shines. Place the lid on your Instant Pot (you don't need to seal it; the pressure valve can be set to venting) and select the "Yogurt" function. Set the time anywhere from 8 to 12 hours, depending on your desired tanginess. A longer fermentation generally results in a tangier, more probiotic-dense yogurt. During this time, the Instant Pot maintains a consistent, warm environment, allowing the good bacteria to convert the natural sugars in the coconut milk into lactic acid, creating that characteristic yogurt flavor and texture.
Don't be alarmed if the yogurt still appears quite thin and runny immediately after fermentation. This is completely normal and expected!
The Chilling Phase: Where the Magic Happens
The final, and perhaps most critical, step for achieving that desired thick consistency is chilling. Once fermentation is complete, gently transfer your still-thin yogurt from the Instant Pot liner into clean, airtight containers. Place these in the refrigerator and chill for at least 6-8 hours, or ideally overnight. As the fat in the full-fat coconut milk cools, it solidifies and thickens considerably, transforming your liquid mixture into a thick, Greek-style yogurt. This is the secret to getting a truly firm, spoonable texture without relying on excessive thickeners, as highlighted in our guide on Achieve Greek-Style Vegan Coconut Yogurt in Your Instant Pot.
Troubleshooting Common Vegan Yogurt Hurdles
Even with the best instructions, sometimes things don't go exactly as planned. Here are solutions to common issues:
Why Isn't My Yogurt Thick?
- Not enough fat: You might have used light coconut milk or a brand with lower fat content. Always opt for full-fat.
- Not chilled long enough: Patience is key! The thickening happens in the fridge. Give it ample time.
- Weak starter: Your probiotic starter might have been old, inactive, or not potent enough. Ensure it has live, active cultures.
- Incorrect temperature: The milk was either too hot (killing the cultures) or too cold (preventing activation) when the starter was added.
Too Tangy? Not Tangy Enough?
The tanginess of your yogurt is directly related to the fermentation time. If it's too tangy, reduce the fermentation period next time. If it's not tangy enough, increase it by an hour or two. Keep notes on your preferred fermentation time for future batches.
Enjoying Your Homemade Vegan Coconut Yogurt
Once chilled, your homemade Instant Pot vegan coconut yogurt is ready to be enjoyed! Store it in the refrigerator in airtight containers for up to a week. Its thick, neutral base is incredibly versatile.
Flavoring & Serving Suggestions
The beauty of plain yogurt is its adaptability. Add flavors *after* fermentation to prevent interfering with the cultures:
- Sweeteners: Stir in maple syrup, agave nectar, or a few drops of liquid stevia to taste.
- Vanilla: A splash of pure vanilla extract enhances the flavor beautifully.
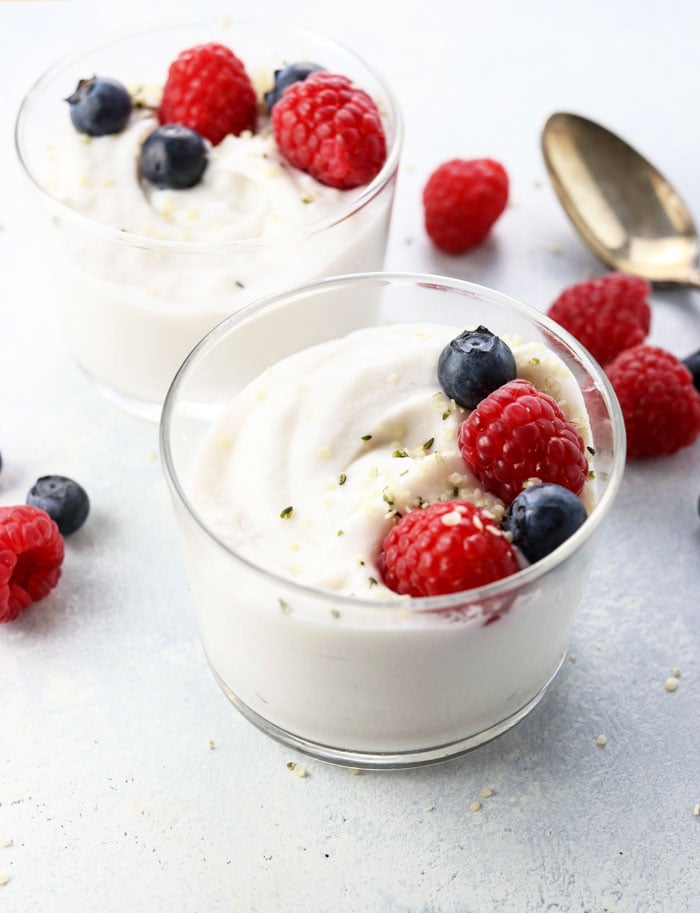
- Fruit: Mix in fresh berries, sliced bananas, mango chunks, or a swirl of fruit compote.
- Toppings: Granola, nuts, seeds, shredded coconut, or a drizzle of chocolate sauce make excellent additions.
- Smoothies & Parfaits: Use it as a base for your favorite breakfast smoothies or layer it with fruit and granola for a delightful parfait.
Learning how to make vegan coconut milk yogurt in your Instant Pot is a rewarding endeavor. Not only will you save money and avoid unwanted additives, but you'll also gain the satisfaction of creating a genuinely delicious and healthy staple in your own kitchen. Experiment with fermentation times to find your perfect tang, and enjoy the rich, creamy texture you've always dreamed of!
