Unlock the Secret to Creamy, Greek-Style Vegan Coconut Yogurt in Your Instant Pot
Tired of expensive, additive-laden store-bought vegan yogurts? Imagine a world where you can effortlessly create luxuriously thick, tangy, Greek-style coconut yogurt right in your own kitchen. Thanks to the Instant Pot, this culinary dream is not only achievable but surprisingly simple. If you've been wondering
how to make vegan coconut milk yogurt that rivals its dairy counterpart in texture and flavor, your journey starts here. Our guide will walk you through a foolproof method, ensuring you achieve that desirable creamy consistency without the need for complex techniques or questionable ingredients.
Making your own dairy-free yogurt is not only budget-friendly but also gives you complete control over the ingredients, ensuring a wholesome, probiotic-rich treat for you and your family. Forget the search for the perfect store-bought option; with your Instant Pot, you’re about to become a vegan yogurt artisan.
Why Homemade Greek-Style Vegan Coconut Yogurt is a Game-Changer
The appeal of homemade vegan coconut yogurt extends far beyond just cost savings. When you opt for store-bought versions, you often encounter a laundry list of ingredients: various gums (like xanthan or guar), starches, and artificial flavors designed to mimic the texture and taste of traditional yogurt. While these might deliver a satisfactory mouthfeel, they can sometimes leave a strange aftertaste or an "off" texture that feels more gelatinous than genuinely creamy. For many, digestive sensitivities to these additives are also a concern.
Our Instant Pot method focuses on natural thickening achieved through the right combination of high-quality full-fat coconut milk and proper fermentation. The result is a genuinely thick, spoonable yogurt with a clean taste and the unmistakable tang of a well-fermented product. This process specifically aims for a Greek-style texture – rich, dense, and perfect for parfaits, smoothies, or savory dips. It's a far cry from the thin, watery consistency some homemade methods yield, and it’s completely free from the industrial thickeners often found in commercial products. The satisfaction of knowing exactly what goes into your food, coupled with the incredible taste, makes this an unparalleled experience.
The Instant Pot Advantage: Mastering Vegan Yogurt
The Instant Pot isn't just for quick dinners; its "Yogurt" function and precise temperature control make it an ideal tool for fermentation. It creates the perfect warm environment for your beneficial bacteria to thrive, transforming coconut milk into delicious yogurt. However, a few key Instant Pot specific insights can elevate your results from good to truly exceptional.
Essential Preparations: Sanitize for Success
Before you even think about mixing ingredients, proper sanitation is paramount. Yogurt making relies on introducing beneficial bacteria, and you want to ensure they're the *only* bacteria growing in your batch. Any rogue microorganisms can lead to off-flavors, poor texture, or even spoilage.
*
Dishwasher: The easiest way to sanitize your Instant Pot's inner pot, lid (if compatible), and any utensils (whisk, spoon) is to run them through a dishwasher on a sanitize cycle.
*
Boiling Water: If your dishwasher lacks a sanitize setting or you prefer a manual approach, bring a pot of water to a rolling boil. Carefully immerse your Instant Pot inner pot, whisk, and other tools for several minutes. Allow them to air dry completely or use a clean, fresh towel.
*
Why it matters: This step creates a sterile environment, giving your chosen yogurt cultures the best chance to flourish and produce that perfect Greek-style tang and thickness.
Heating Your Coconut Milk: The Saute Secret
One of the initial steps in making yogurt is heating the milk to a specific temperature. For dairy milk, this denatures proteins and kills unwanted bacteria. While coconut milk doesn't have the same protein structure as dairy, heating it to around 180°F (82°C) is still a good practice to ensure any potential spoilage bacteria are eliminated, creating a clean slate for your yogurt cultures.
You might be tempted to use the Instant Pot's "Boil" or "Yogurt" function for heating, but experience shows that these functions might not always reach the necessary temperature. Many users report the "Boil" function only reaching around 150°F (65°C), which isn't quite hot enough.
*
The Saute Solution: The "Saute" function is your secret weapon here. It provides direct, powerful heat that can quickly bring your coconut milk to a rolling boil, ensuring it surpasses the 180°F (82°C) mark. Simply press "Saute" (adjust to "More" for faster heating if available), add your coconut milk, and stir frequently to prevent scorching.
*
Temperature Check: If you have a kitchen thermometer, aim for 180°F (82°C). If not, a rolling boil is a reliable visual indicator that you've reached a sufficiently high temperature. This ensures a sterile base for your cultures. This crucial heating step is further detailed in our related article:
Homemade Vegan Coconut Yogurt: Instant Pot Saute Secret.
Achieving Greek-Style Thickness Naturally
The holy grail of homemade vegan yogurt is undoubtedly its texture. Nobody wants a watery mess. For a truly Greek-style consistency, several factors come into play, moving beyond the less-than-ideal results of excessive tapioca starch or the overly rich nature of pure coconut cream:
*
Full-Fat Coconut Milk is Non-Negotiable: This is the foundation of thickness. Opt for canned, full-fat coconut milk (often labeled "full-fat" or "premium"). Avoid "light" or "reduced-fat" versions, as they simply won't yield the desired rich texture. Look for brands with minimal additives, ideally just coconut extract and water. The fat solids are what solidify during chilling.
*
The Magic of Chilling: Your yogurt will appear thin and runny directly after the fermentation cycle in the Instant Pot. This is perfectly normal! The true thickening happens in the refrigerator. As the yogurt chills, the fat content in the full-fat coconut milk solidifies, transforming it into that luscious Greek-style consistency. Give it at least 8-12 hours, or even overnight, for optimal results.
*
Natural Thickening from Fermentation: While full-fat coconut milk is key, the fermentation process itself also contributes to the yogurt's body. As the cultures work their magic, they break down components of the milk, subtly altering its structure and contributing to its final texture. While some recipes might call for a *minimal* amount of natural thickener like agar-agar or a tiny bit of arrowroot powder *after* heating, our focus here is on maximizing the natural thickening properties of high-quality full-fat coconut milk and proper chilling. This approach helps achieve a thick, additive-free yogurt, which is explored further in:
Easy Instant Pot Vegan Coconut Yogurt: Thick & Additive-Free.
Step-by-Step Guide to Your Instant Pot Coconut Yogurt
Now that we've covered the critical insights, let's dive into the practical steps to
how to make vegan coconut milk yogurt that's wonderfully thick and satisfying.
Ingredients You'll Need
* 2 (13.5-ounce / 400ml) cans full-fat coconut milk (ensure they are good quality, often found in Asian grocery aisles or specialty stores, free from gums if possible)
* 2-3 probiotic capsules (at least 25-50 billion CFUs, ensure they are dairy-free and contain strains like *Lactobacillus* and *Bifidobacterium*) OR 2 tablespoons of a plain, unsweetened, live active culture vegan yogurt as a starter.
The Fermentation Process: From Thin to Thick
1.
Sanitize Everything: As discussed, thoroughly clean and sanitize your Instant Pot inner pot, lid, whisk, and any other utensils you'll use.
2.
Heat the Coconut Milk: Pour both cans of full-fat coconut milk into the sanitized Instant Pot inner pot. Select the "Saute" function (set to "More" if available). Stir frequently until the milk reaches a rolling boil, or if using a thermometer, 180°F (82°C). This usually takes a few minutes.
3.
Cool Down: Turn off the Instant Pot and allow the coconut milk to cool down significantly. It's crucial to cool it to between 100-110°F (38-43°C). If it's too hot, it will kill your probiotic cultures; too cold, and they won't activate. You can speed up cooling by placing the inner pot in an ice bath.
4.
Add Your Starter: Once cooled to the optimal temperature, add the contents of your probiotic capsules (twist open and empty the powder) or the vegan yogurt starter. Whisk thoroughly until well combined.
5.
Ferment: Place the inner pot back into the Instant Pot base. Secure the lid (ensure the vent is sealed). Select the "Yogurt" function. Adjust the time to 8-12 hours. For a tangier, thicker Greek-style yogurt, aim for the longer end of this spectrum (10-12 hours).
6.
Check for Doneness: After the fermentation cycle, open the lid. The yogurt will appear thin and perhaps a bit jiggly. Don't worry, this is normal! You might see some separation (whey on top), which can be stirred back in or drained for an even thicker result.
7.
Chill and Thicken: Transfer the yogurt to clean glass jars or an airtight container. Refrigerate for at least 8-12 hours. This chilling period is absolutely essential for achieving that characteristic Greek-style thickness. The longer it chills, the thicker it will become.
Troubleshooting & Advanced Tips for the Perfect Batch
Even with the best instructions, homemade cooking sometimes throws a curveball. Here are some tips to ensure your vegan coconut yogurt turns out perfect every time:
*
Yogurt Not Thickening?
*
Did you use full-fat coconut milk? This is the most common culprit. Light coconut milk will never thicken properly.
*
Did it chill long enough? Patience is key. Give it at least 12-24 hours in the fridge.
*
Is your starter active? Check the expiration date of your probiotic capsules or starter yogurt. Old cultures won't ferment effectively.
*
Did you kill the cultures? Ensure the coconut milk was cooled sufficiently (100-110°F) before adding the starter.
*
Too Tangy/Not Tangy Enough? Adjust fermentation time. Shorter times (8 hours) yield milder yogurt, while longer times (12+ hours) increase tanginess.
*
Saving a Starter Batch: Once you have a successful batch, you can use a few tablespoons of your homemade yogurt as a starter for your next batch (within 5-7 days). This can make future batches even more consistent.
*
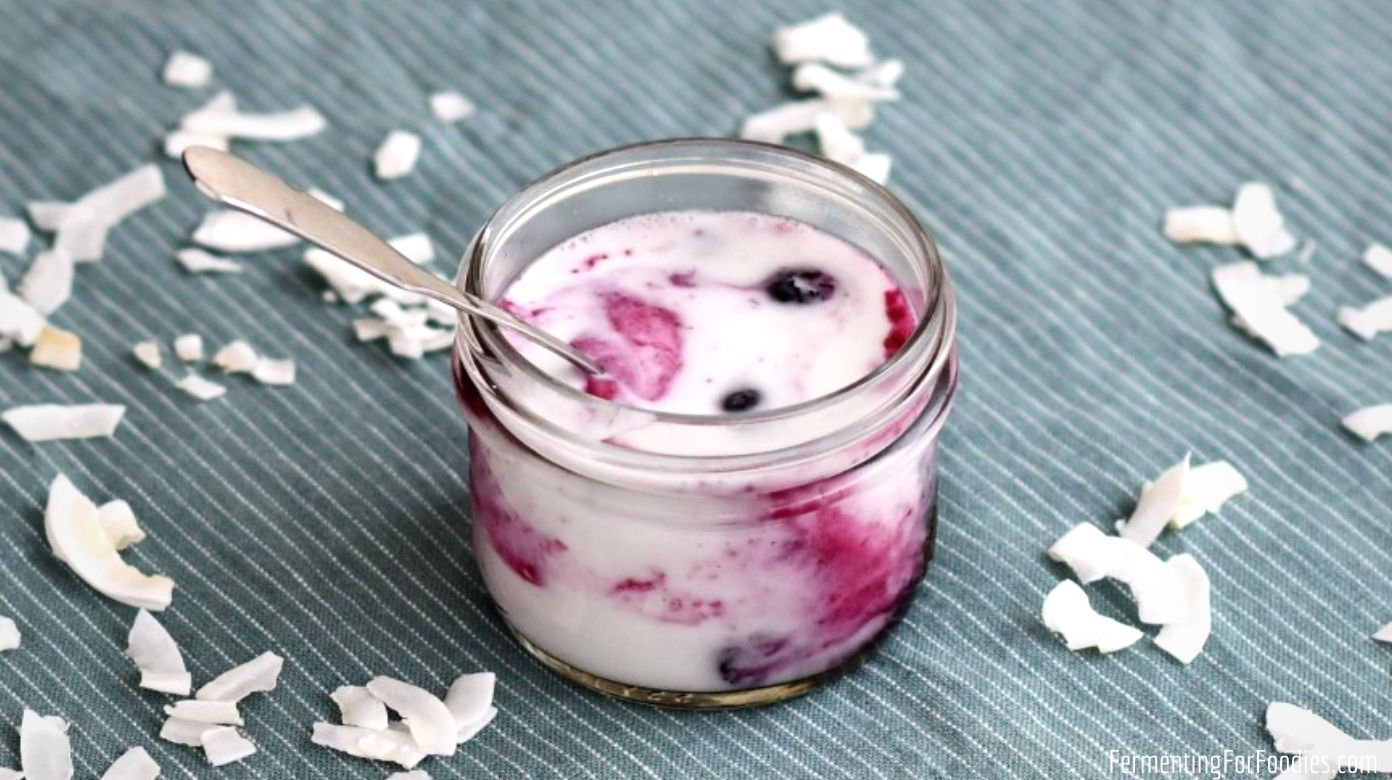
Flavoring Your Yogurt: Once chilled, your Greek-style vegan coconut yogurt is a blank canvas. Stir in a touch of maple syrup or agave for sweetness, vanilla extract, fresh berries, granola, or a swirl of fruit puree. For savory applications, mix in herbs, garlic, and lemon juice for a delicious dip.
*
Coconut Oil Separation: Occasionally, particularly if the temperature fluctuations during cooling are significant, you might notice a layer of hardened coconut oil on top. This is normal and can be stirred back in once the yogurt is chilled, or skimmed off if preferred.
Conclusion
Congratulations, you're now equipped with all the knowledge to create your own incredible Greek-style vegan coconut yogurt using your Instant Pot! This method not only demystifies
how to make vegan coconut milk yogurt but also empowers you to enjoy a homemade, additive-free, and probiotic-rich staple that will revolutionize your plant-based diet. Experiment with flavors, enjoy it plain, or incorporate it into your favorite recipes. The journey to delicious, healthy, and affordable dairy-free yogurt starts with a press of a button. Enjoy the creamy, tangy results of your culinary endeavors!